
We currently live in the era of Artificial Intelligence. However, everyone loves a handmade object. While the rest of the world may be focusing on advancing technology and leaving behind handcrafted items, guitarists definitely aren’t.
Guitarists have started their own way of soldering metal and building equipment for their sonic devices. But, these procedures need caution as they involve a lot of high voltages and currents that can lead to some severe issues.
Building A Stereo Tube Amp
Here are the steps to build a stereo tube amp on your own.
-
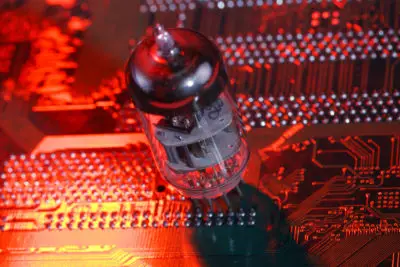
Know About The Tubes
A vacuum tube (also known as a valve) is an electronic glass tube that influences the electric current flow.
Diode:
A diode is the primary vacuum tube, as it is named after the two electrodes used in it. It accepts current from the cathode and blocks the current from the anode. The diode follows thermionic emission – when the cathode is heated by current and a positive voltage is traveling from the anode, the electrons will be allowed to flow from cathode to anode.
Triode:
Apart from the two electrodes, this one is called the grid. The grid will carry negative voltage and act as a wall. It allows only a few electrons repelling others to get through the anode and reduces the anode current. The amount of negativity in the grid is based on the audio signal’s amplitude. It uses a small amount of current to control a large number.
Tetrode:
Here, another electrode is called a screen or shield. It blocks the electron flow instead of the grid. When the electrons flow unrestricted from the cathode, they will be prevented by the screen. However, some will penetrate through and continue to flow towards the anode.
Pentagon:
In this tube, there will be a fifth electrode, which is called a suppressor. This negatively charged electrode will be present between the anode and screen. It also repels the electrons from running to the anode freely.
-
What You Need
The amplifier is divided into two sections: audio circuit and power supply. You will need parts for both sections, which include:
- Electrical enclosure
- Four transformers: each one for – heating filament, main positive supply, negative supply, and choke transformer (inductor)
- Tubes
- Resistors
- Capacitors
- Potentiometers, switches, and jacks
- Other things like a screw, nuts, and bolts
Tools needed:
- A Phillips-head screwdriver
- Wire strippers
- Good quality solder
- Soldering iron
- A Digital Multimeter (DMM)
- Needle-nose pliers
- Wire cutters
- Reverse-action tweezers
-
Learning Audio Circuit
Let’s take a look at the 6V6 push-pull amp. 6V6 is the tube model and the push-pull is a unique case with differential circuits where the whole signal is created by the difference of positive and negative voltages.
One tube produces a positive part of the AC audio signal by pushing the speaker out, and the other creates a negative part that pulls the speaker in, which makes a sound wave. This is what the types of tubes we discussed will be performing.
-
Tubes’ Jobs
The preamp’s two triodes’ cathodes are interconnected, and the electrons will be rushing out. This leads to current flowing in one direction through the circuit. Transformers then create current to force the speaker cone to move outward.
The grid will repel the electrons to the cathode. This, in turn, forces current to flow in the opposite direction. When it reaches the primary coil of the output transformer, it will create a current in the secondary coil, making the speaker cone move inward.
Before reaching the speaker, the signal will be filtered via capacitors and flows to the main amplifier section. The 6V6’s shield is linked through the resistor to the anode to give it a small part of anode voltage.
-
Planning
Keep the two sections separate. All tubes should be together in an area, and the output transformer will need to be nearby. If you are placing the tubes and transformer close, use a metal cover over the transformers and ground the cases correctly to avoid the humming issues.
Sometimes, printed circuit boards are not used. Instead, you will be using a free-form circuitry type with components soldered to each other, and the terminal strips will be minor junctions of connections.
-
Enclosure Build
Using a spacious metal enclosure is recommendable, as it will be easier for you to ground those things by connecting the ground to the chassis. In addition, you can use a cutlery box with copper-coated plates inside.
-
Building Begins
Use the copper-coated plate. It will make it easier to ground anything linked to it, including transformers (can reduce hum). The transformers are connected to the plate with nuts and bolts to fix the plate inside. While stripping the wires, don’t forget to twist the ends of the cables. Also, try to keep the wires short.
-
Power Supply
You can use two copper plates for the two sections. You need to focus on the amp’s layout, where the tubes will be, and how to link the gap between the audio circuit and power supply. Then, the components are soldered directly to each other. The terminal strips will keep them secured to the case.
-
Audio Circuit
This is when things get messy. The placement of tube sockets and wires crisscrossing everywhere may confuse you. This is the time to connect the capacitors. Be careful, as they hold on to a significant charge. Don’t forget to discharge them.
You can replace these components with high-quality parts in the future, as these are the parts that play essential roles in the sound quality of the amp.
-
Testing
After putting them all together, don’t plug them in the wall directly. If you made some mistakes, it can fry some components. When you notice smoke coming out, you can conclude that the process has failed.
First, check everything using a power adapter used for a phone or other low voltage device. Then, link the device to the power socket’s terminals and test the points on the location where the voltage is detected using a multimeter.
-
Finishing Up
If everything goes right, plug in the amp and pray that everything goes accordingly. Once you are sure that the power supply is good to go, connect the amp with speakers and check the sound.
Keep on working with the connection until you get some sound. However, be careful when doing so.
Conclusion
If you are new to all of this, don’t worry about making mistakes. Even an experienced person will make mistakes while building a stereo tube amp. The key to building this successfully is to follow the rules and look at the schematics before starting.
First, go for a basic circuitry plan. After getting familiar with how it works, you can go for more advanced technologies.
These links will help you keep up wi
Reference link (image and content): https://www.instructables.com/Building-A-Stereo-Tube-Amp/