
With today’s modern technology, it can be a surprise to find a relic of a past era still active. This is exactly what a tube amplifier is. Powered by vacuum tubes, these amps increase sound volume greatly. Though transistor amps are available, a lot of musicians swear that a tube amplifier delivers a warmer, better sound.
However, this sound quality come at a cost. Tube amplifiers are not as durable other amp types. This is why it is important to know about proper tube amp maintenance. A lot of people just throw some amps away after they start breaking down, but with some elbow grease, you will be able to get that amp sounding great once again.
How They Work
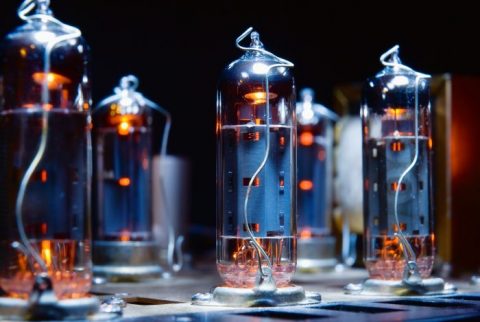
The most important part of the amp is its vacuum tube. Normal vacuum tubes, called diodes, have two electrodes, a positive and a negative one. In the vacuum of the tube, a cathode heats up. This results in the attraction of electrons.
Tube amps use a different kind of vacuum tube. Called triodes, these have a third electrode. This is the grid and it is put in between the cathode and anode. This electrode usually has a negative charge. This stops electrons from passing through the current.
However, the grid can change in charges. This allows for you to control the flow of electrons from the amp to your speaker. Depending on the charge of the grid, this can affect its output. The result is the amp can control the volume of the sound of the device and its tone.
The problem with using vacuum tubes is that they are comparatively fragile to their modern counterparts. If you’re thinking of long-term use, the you will need to check on them regularly to see if they had broken down. More importantly, you will need to know about maintaining them properly.
Basic Maintenance
If you’re a new owner of a tube amp, there are some things that you will need to know. It can be difficult and time-consuming, but it is rewarding to hear your music in its full glory. Here are some tube amp maintenance tips to help keep your tube amp in its full glory.
- Keep It Regular. Regular maintenance is the key to keeping your tube amp in great condition. The best way to stop a problem in its tracks is before it happens. This is why you should check on your amp on a regular basis. Set aside time once a month to go over your amp with a fine-toothed comb to see if anything is wrong. Besides that, replace the tubes every five to seven years. This ensures that even if nothing noticeable is wrong, it is still in top condition.
- Notice the Symptoms. If you put your amp to heavy use, you will start to notice a few things. One of these is how well it performs. So, you’ll start to notice if your amp is not performing well. This can range from just producing tired and ragged sounds to becoming a bit too noisy. These are warning signs that you should pay serious attention to.
- Replacement Parts for Everyone. A lot of people assume any problem with a tube amp comes from its tubes. However, these problems can persist after a tub replacement. There are other candidates for replacement parts on an amp. Filter caps are a good second candidate for replacement, though the manufacturers solder them in place. Any amp older than a decade will need a cap checkup to see if they are still in good condition. Other parts may need replacement, too. This is especially important if you are working with second-hand equipment.
- Do Tune-Ups. Tune-ups are not just for your cars. They tighten up loose parts and clean up the dirt. With these done, your amp’s performance should greatly improve even if there was nothing greatly wrong with it. One of your focuses should be in the tube sockets. They should be clean so that the circuits will suffer no interruptions. Another thing to clean up are the access points so that they don’t have dust in them. Scratchy tone and volume controls also need a check-up to see that they are functioning well.
Replacing the Tubes
However, the most important thing to know is how to replace tubes. You can do this either all at once or just replace a problematic tube. Piecemeal replacement is not ideal but it can be a lot cheaper than a full one.
The process for replacing the tubes goes like this. You switch off the amp and let it cool for five minutes. The next step is tube removal. Be careful since these are glass tubes and they are fragile.
Use a piece of cloth so that you do not touch the tubes directly. To pull them out, wiggle lightly as you start pulling to loosen the connection. They will eventually get loose, so carefully pull them out.
The next step is putting in new tubes. Pick up the new tube with cloth again. Put it against the tube socket so it is in proper alignment. Push it in gently and wiggle it in until it is properly set. Do these for all the tubes.
To see if it is working properly, turn the amp to stand by and let it warm up for five minutes. You can then switch it on. For individual replacements, the same procedure should apply.
Letting the World Know Your Sound
Tube amp maintenance is an important piece of knowledge. However, these are just the basics. There are different kinds of tube amps on the market and each has their own peculiarities. You’ll want to gain experience with them to fully understand how to properly maintain them.
It is important that you read a tube amp’s manual or get further instruction on its usage after you buy it. This can mean the difference between needing to replace it completely in just few years or seeing decades of use from it.
With the right know-how, your amp can make your sound heard for a long time to come.
Need more? Check out